Wednesday, November 14, 2012

Radish Kimchi

One of my favorite kimchi is radish kimchi.  My last staycation I had; I made 4 quart jars of cabbage kimchi and 3 quart jars of radish kimchi... let's just say I ran out a month ago of the radish kimchi. Thus this staycation, I've made another batch of radish kimchi.  Fortunately, I've prevented the fridge from smelling only of kimchi by storing my quart jars in gallon freezer bags. :)

I found this radish kimchi (Kkakdugi) recipe at maangchi.com  There are a bunch of awesome korean recipes on there.

Ingredients:
4lbs of korean radish (picture above)
2 Tbsp salt
2 Tbsp of sugar
4 stalks of green onion
1 tsp of minced ginger
2 Tbsp of minced garlic
1/4 c of fish sauce
2/3 cup of gochugaru (korean hot pepper flake)
1/3 c of radish juice
Directions:
1. Cut radish into cubes as seen above.
2. In a large bowl, massage radish with salt and sugar.  Let stand for 30 mintues
3. Drain and reserve radish juice and set aside
4. In same large bowl, mix cubed radish with the rest of the ingredients

Let marinate for 3 days or so on the kitchen counter.

Delicious! Mouthwatering! Spicy!


Sunday, July 15, 2012

Pulled Pork

This is one of my favorite recipe finds.  I don't think I ever had a pulled pork sandwich growing up so I had to look this one up. Found on Good Housekeeping's website "Slow-Cooked Pulled Pork."  Also, it's quick and easy. Just throw the ingredients into a crock pot and let it do it's thing for 5-7 hrs.

Of course, I end up changing up a few things to adapt to my taste.  Don't use as much mustard...and since I love chipotle peppers, I add a few peppers from a can of chipotle in adobo sauce.


Ingredients:
1 medium onion, chopped
1/2 c ketchup
1/3 c of cider vinegar
1/4 c packed brown sugar
1/4 c tomato paste
2 tbsp sweet paprika
2 tbsp Worcestershire sauce
1 tbsp of yellow mustard
1 1/2 tsp of salt
1 1/4 tsp of black pepper
2-3 chipotle peppers
4 lbs boneless pork shoulder (pork butt)
Sandwich buns
1. Throw in everything but the pork shoulder into a crock pot set on high.
2. Cut the fat off of your pork butt and section into 4 pieces.
3. Set your crockpot on High if you are short on time. It'll be done in 4-5 hours.   Or if you have all day, set it on low and it'll be done in 8-10 hrs.
4. Check on it every 2 hours and turn the pork.
5. Just before you are ready to serve it, remove the pork and shred it with a fork.
6. Leave the sauce in the crockpot to boil off some liquid and thicken. 
7. Toast up some buns (the onion buns at Walmart go pretty good with the pulled pork), spoon some pork and plenty of sauce on top.

Sorry no after pictures... we ate them up before I could snap a photo lol.

Tuesday, January 3, 2012

Chicken Satay


Finally posting my chicken satay recipe!  This is another one of those comfort foods that I didn't grow up cooking in the kitchen.  I associate my satay experiences with Wat Thai in LA, the Thai restaurants in LA, and of course Thailand... specifically Chonburi, Thailand...a coastal region just an hour or two from Bangkok.  There is an epic story (epic in that it is told every time I see my mom's side of the family) of when I visited the summer between 5th and 6th grade.  I went alone one summer and stayed with my relatives in Bangkok and Nakorn Ratchasima...hmm and I think Khao Yai. Either way, I stayed with my aunt in Muang Chon/Chonburi for a week... and I ate a record 40 chicken satay in one sitting at a food stand near her house.  Granted they were 2-bite-sized piece. And, ever since she makes sure she takes me there every time I visit.

Even though we didn't have it at home on a regular basis, this recipe comes from my mom. She knows how I like my chicken satay and I get my need to be efficient from her :)


Marinade (min 2 hrs) & Grill the Chicken:
1 tsp of curry powder
3 tbsp of coconut milk, the thicker portion
1 tbsp of golden mountain soy sauce
2-3 chicken breasts, sliced lengthwise in ~1/4inch pieces

1) In a ziploc bag, mix the curry powder, coconut milk, and golden mountain sauce.
2) Place the sliced chicken breast into the ziploc bag (you can make another batch of marinade if you the chicken doesn't fit in one) and let it marinate for at least 2 hrs. I prefer overnight...you can taste the difference.
3) When ready to grill, soak the wood skewers (which can be found at your local Asian market for pretty cheap $0.99 for 50-10" skewers) in water for about 1/2 an hour or a few minutes.
4) Skewer the chicken and grill em up.  About 3-5 minutes on each side on a medium heat grill.
Check the thickest portion of one of your satay and make sure it is nice and white (not pink).


Peanut Sauce:
1 1/2 tbsp of peanut butter
1-2 tbsp of red curry paste (depends on how spicy you want it)
1 cup of coconut milk (can add more if you want the sauce thinner)
about 2 tsp of sugar
big pinch of salt
1/4 of a small lime
1) Combine all ingredients into a medium saucepan on medium heat.
2) Let it simmer on low heat while you grill your satay.  (Don't let it burn)


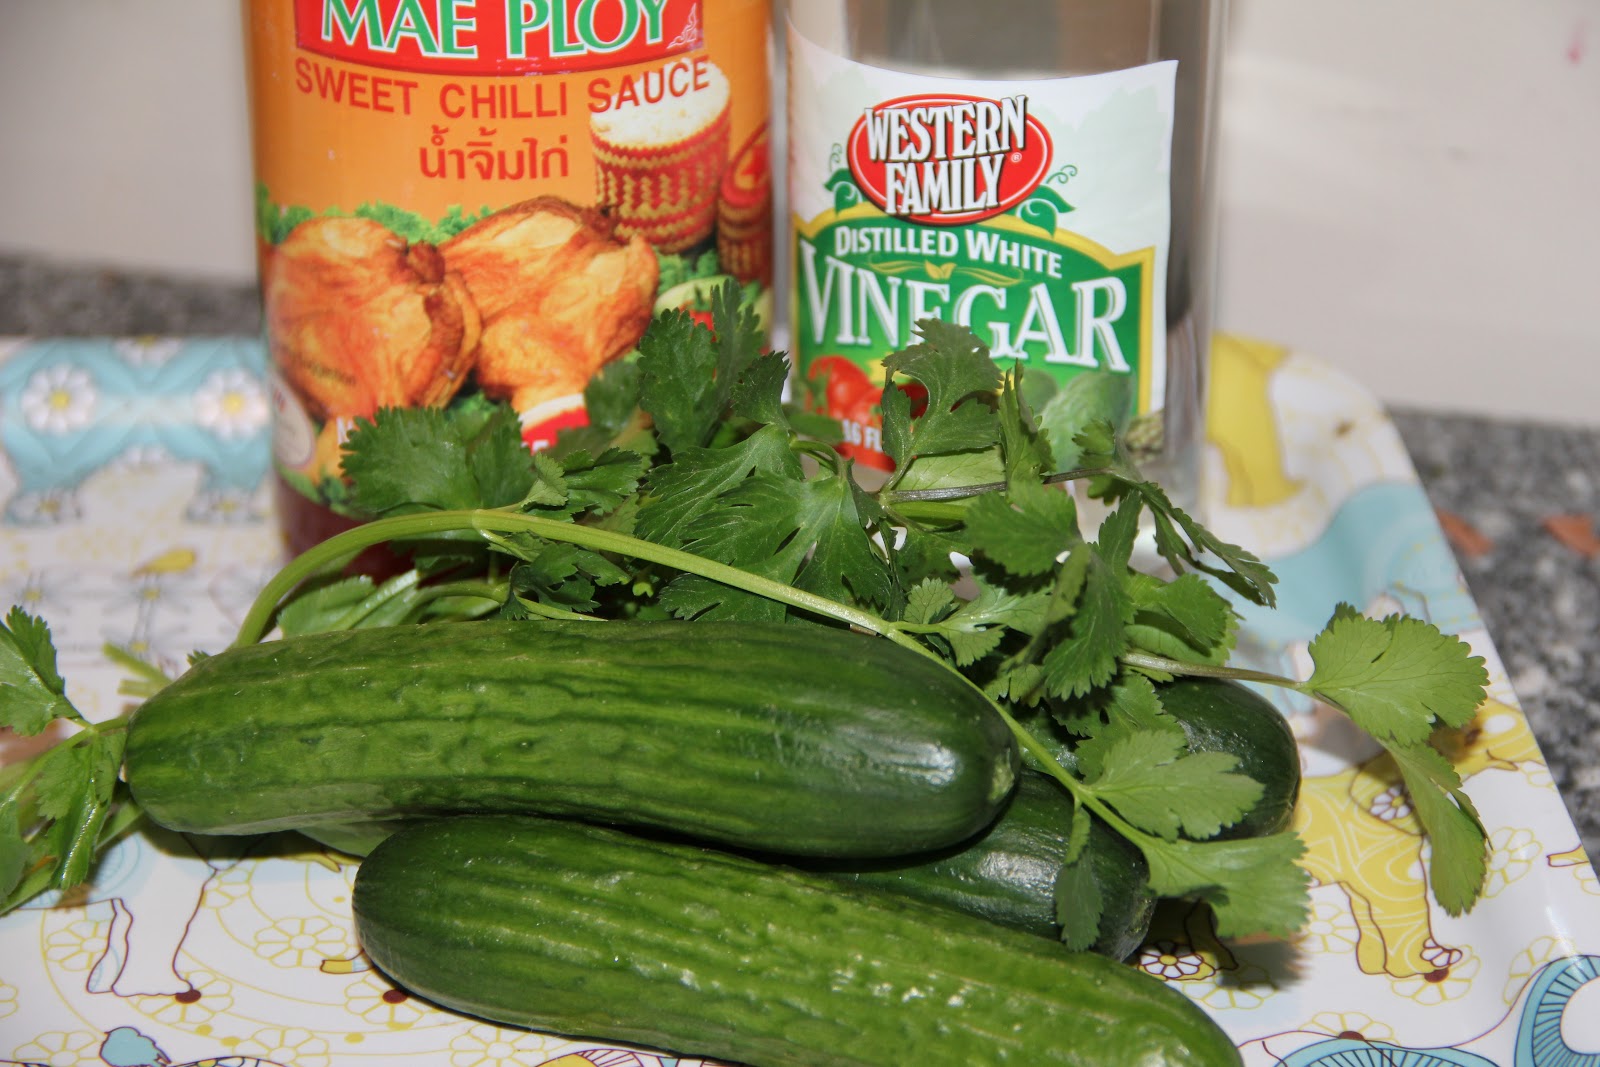
Cucumber Salad:

2 -4 mini cucumbers, sliced into 1/4 inch pieces
2 tbsp of Thai sweet chili sauce
2 tbsp of white vinegar
a few sprigs of fresh cilantro, chopped

 1) In a large bowl, combine all ingredients and mix well.


Enjoy! Serve with some toasted bread.

Saturday, December 31, 2011

Making Kimchi is like Making Beer...

...there are no shortcuts.

I found this stellar recipe for Traditional Napa Cabbage Kimchi in the December 2011 issue of Food and Wine. This recipe is adapted from the hostess of Kimchi Chronicles, Marja Vongerichten. I'll have to check out that TV series. I was on the interview trail and finally gave in and bought a magazine.  It was full of great articles and recipes; and I held onto it as I trekked around the Midwest.  I even created a "bucket list" of some sorts just from the one issue alone.  So far I've attempted the kimchi. I'd like to try making the Sweet and Sour Pork Shoulder.

Back to the Kimchi. I tried making Cucumber Kimchi about a year ago but found no direction on how to perfect it.  The cucumber soggified by the time it tasted right.  I tried this recipe for the more common cabagge kimchi, and it came out almost perfect. I felt I could work with it.

Attempt #1 (as pictured in previous post):
  • Came out almost perfect.  I followed the recipe almost exactly....
  • My only variation that day (as I was juggling another new recipe for dinner that night) was I let the kimchi soak in the salt a lot longer than the suggested 45 minutes x 2. And I just rinsed it in the bowls they soaked in.
  • Result: Perfect bite. Not spicy enough!

Attempt #2 (My Christmas Kimchi):
  • ~doubled the amount of Korean red pepper powder to 1 1/4 cups.
  • Had all my ingredients in the fridge for a few days before I made it. (In retrospect, the cabbage was a little soggy to begin with.)
  • Used warm water to rinse the salt from my cabbage.
  • Salt soak exactly 45 minutes x 2.
  • Result: No bite.  Adequately spicy. A bit too sweet. Dry.
Attempt #3 (Practice makes perfect?!):
  • Used fresh ingredients.
  • Stuck with the 1 1/4 cups of Korean red pepper powder.
  • Used cold water only. Rinsed about 3 times in the bowl they soaked in.
  • Salt soak 1 hour x 2.
  • Result: ... will update in 2 days! I hope this one is it! 
Attempt #4 (This is it!):
  • Used fresh ingredients.
  • 1 1/4 cups of Korean red pepper powder.
  • Used cold water only. Rinsed about 3 times in the bowl they soaked in.
  • Salt soak 45 min x 2.
  • Result: Perfect bite and heat!
  • The key was buying quality Korean red pepper powder (Gochugaru).  Look for the kind that is Made in Korea!

INGREDIENTS:
6 1/2 lbs napa cabbage: halved, cored and cut into 2 inch pieces
2/3 cup of kosher salt
10 garlic cloves, halved
1/2 small onion, chopped
1-inch piece of fresh ginger, peeled and chopped
1/4 cup sugar
1/4 cup + 3 tbsp of fish sauce
1/2 lb of daikon, peeled and cut into matchsticks
2 bunches of scallions, cut into 2 inch pieces
1 1/4 cup gochugaru (Korean coarse red pepper powder)

DIRECTIONS:
1) In two large bowls (or a massively large bowl), create layers of the cabbage and salt. Let stand for 45 minutes.  Toss cabbage well and let stand for another 45 minutes. The salt will draw out the water from the cabbage and you should be left with cabbage that looks like about half the amount you started with.
2) Rinse salt from cabbage under cold water, about 3 times. Drain the cabbage in a colander and transfer back into the bowl you used or a larger bowl (if you have one).
3) In a mini food processor (I used my magic bullet), puree the garlic, onion, ginger, and sugar.
4) Add the fish sauce and pulse a few times.
5) Add the daikon and green onion to your cabbage.
6) Mix the puree and red pepper powder into the cabbage mixture. (It gets messy! Use gloves)
7) Lightly pack the kimchi into three 1-quart jars (found mine at walmart).
8) Press plastic wrap to the surface of the kimchi and put the caps on loosely.
9) Let stand at room temperature for 3 days. Kimchi should have a good bite and smell of wonderful garlic.
10) Store in refrigerator tightly sealed (or everything in your fridge will be kimchi-efied)

Friday, December 16, 2011

Almost Kimchi!

My first attempt at making the classic napa cabbage kimchi.  I've tried the cucumber kimichi; that turned out ok but not perfect. It lost it's bite/crunchiness.
Was inspired by the recent Food and Wine that I picked up at the airport. We'll see if this recipe works and I'll post it if...when I succeed!

Saturday, December 3, 2011

Omaha Steak Night!


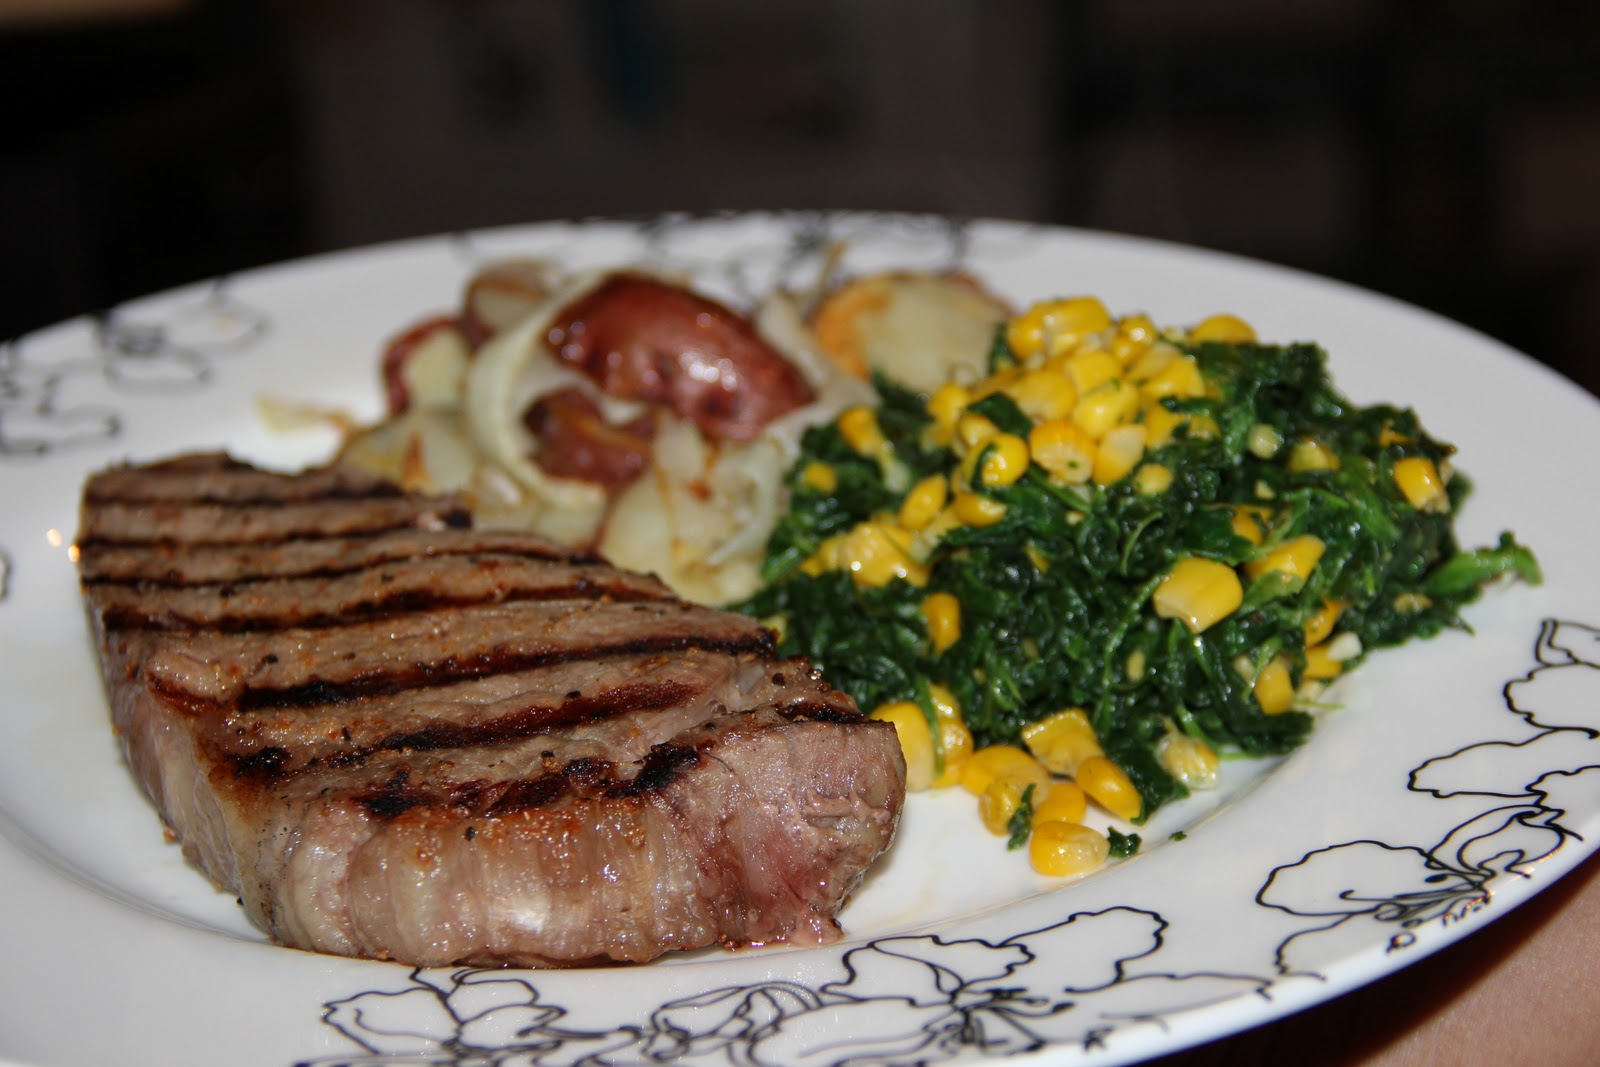
No matter what the temperature is outside (22 F tonight in Salt Lake), the only way to cook a steak is to grill it!

Steak is such a simple and quick dinner.  Since it is so quick, you should start your sides first. I balance out the meal with healthy sides (and of course a glass of cabernet sauvignon):


Roasted Red Potatoes and Onion:
3 red potatoes thinly sliced (about 1/4" thick)
1 small yellow onion sliced (1/4" as well)
1 tbsp of olive oil
Pinch of salt, pepper, and rosemary

1) Preheat oven to 350 F
2) Toss the potatoes in the olive oil and spice mixture until well coated.
3) Toss the onions in the mixture separately
4) Roast the potatoes for 15 minutes on both sides
5) Throw the onions in for the last 15 minutes


Garlic Corn and Spinach:
Adapted from a Rachel Ray recipe; but I substitute the cream for milk and use either canned/frozen veggies.
2 tbsp of butter
1 can of corn (or fresh corn)
2 cloves of garlic, minced
Pinch of salt, pepper, and a very small pinch of nutmeg
1/4 c of milk (or cream)
1 package of spinach (frozen or fresh)

1) In a medium heat pan, melt the 2 tbsp of butter
2) Add the drained can of corn and cook for about 5 minutes
3) Add the garlic and other spices and cook for about 3 minutes
4) Add the milk and cook on low-medium heat for about 10 minutes (until most of the liquid has evaporated away)
5) Add your spinach and cook for the last few minutes. (note: if using frozen spinach, try to thaw it first and remove as much liquid as you can)


Once your sides are done, you can go out and grill your steaks! (Beware of Alaskan Malamute...she may try to take 'em off the grill!)

Grill your steaks on low-medium heat for about 3-5 min each on each side. (Depends how your like your steaks)


Sunday, November 20, 2011

An Early Thanksgiving Dinner


The holidays are AWESOME... it means time with family and great food!  Even though my parent's did not grow up in the US. They still held to the tradition of gathering as a family (and family friends...who we just call family anyways) and had a big feast.  I remember one Thanksgiving when it was at my house; my cousin, Suda (who loves to bake and makes amazing desserts), asked my dad if we had any butter. We had to go to the grocery store, and he told me to go grab some butter and some cups.  We get home and I hand the cups and the butter to Suda.  She says..."what are the cups for? I just asked for a cup of butter." Anyways, we laugh about that night to this day.

Back to the food blog... It is the Sunday before Thanksgiving... why in the world is this girl making a turkey dinner?  The answer is simple: I love to cook. And, with our nifty little convection oven, I can cook at 12 lb turkey in a little over 2 hours.  Turkey dinners are also in the rotation and we've nailed it down to just 3-4 hours to throw together a thanksgiving dinner (as long as the turkey is thawed). 

The must have sides that we have with our turkey these days are:

Homemade Roasted Garlic Mashed Potatoes
Green Bean Casserole
Cornbread Stuffing
Corn
Homemade Chunky Cranberry Sauce
Homemade Turkey Gravy

Someday, I will venture into other sides; but these work well so far.  We might have to add our garlic spinach and corn that we've made before.

And, maybe someday I'll do a less traditional turkey like my mom's curry turkey or my brother's Peking turkey.

***The key to a tender and moist turkey is the rub, the butter, and cooking it breast side down until the last 30 minutes.***

The "Stuffing" and the Rub:

1 tbsp kosher salt
1/2 tbsp of fresh ground pepper
1/2 tbsp of thyme
3/4 stick of butter (sliced into 1/8" pieces)

1 carrot, cut into 1" pieces
1 celery stalk, cut into 1" pieces
1 small onion ,quartered
2 bay leaves
3 cloves of garlic
1 tbsp of olive oil


1) In small bowl, combine the salt, pepper, and thyme.
2) In another bowl, combine the carrot, celery, onion, garlic, bay leaves, a big pinch of your spices above and olive oil.

Prepping and Cooking the Turkey:
Preheat your convection oven to 325 F or regular oven to 350 F

1) Take the neck out of the abdominal cavity and the bag of giblets out of the neck pouch of your 10-12 lb turkey.


2) Rinse the turkey well (You can thaw it in cold water for about 3 hrs or thaw in the fridge for a few days)


3) Drain any excess water from your turkey and pat dry the outside and inside the abdominal cavity.
4) Place your turkey on your roasting pan with the breast side up.
5) Gently run your fingers/hand to separate the skin from the breast meat. This will be a great reservoir for your rub and pats of butter.
6) Take a big pinch of your salt, pepper, and thyme (let's just call it SPT) and rub it directly on the meat (under the skin) on both sides.

7) Place the pats of butter under the skin all along the breast meat.
8) Rub another big pinch of your SPT on the outside of the bird.
9) Insert the carrots, celery, onions, and bay leaves inside the abdominal cavity.
10) Close the opening with a bamboo skewer
11) Flip the bird over and used the rest of the rub on the backside.
12) Place the turkey into your oven and set for 1 1/2 hrs.
13) After 1 1/2 hrs flip the turkey so it is now breast side up, cook the turkey for another 30-45 minutes. Basting optional.


14) Remove the turkey from the roasting pan onto your serving plate.
15) Pour your drippings into a bowl.
16) Place your roasting pan on medium heat and pour a few tablespoons of the drippings in the pan.
17) Add 2 tablespoons of flour and constantly stir until full incorporated.


18) Stir in a cup of chicken stock.
19) Pour gravy through a strainer into a bowl.